So last week I finished an original pattern for train cars, and shared a rhyme. And I promised THIS week I’d actually MAKE the pattern! Plus I thought I’d talk about the process I use to come up with original flannelboard patterns. Hint: It involves nothing fancy, and LOTS of copying and tracing and incremental adjustments.
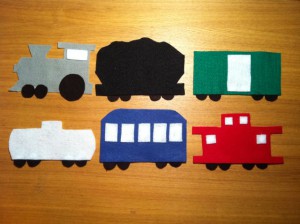
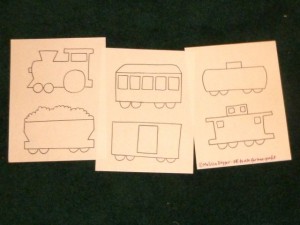
Here’s the finished train cars! The rhyme I adapted is on last week’s post. Here’s my Train Car pattern (pdf).
One adjustment I can see now that I’ve got all the finished pieces in one place: The engine needs to be bigger! If you’re going to make this set, either shrink down the rest of the cars on your photocopier, or increase the size of the engine.
Now, how did I get here?
I Don’t Bite Off More Than I Can Chew
Whenever I’m considering whether to make my own patterns, first I look at what I’m trying to create. Is it made up of basic shapes? Is there iconic imagery I can tap into? If the answers are yes, I will give making my own patterns a try. If the images are complex, and unique, then maybe I will look for a template somewhere else. I have some basic drafting and composition skills, but I’m not really an artist. So I will be more successful if there are lots of “crutches” I can use to make the patterns I want. And my personal crutches are basic shapes and cliches.
This is what I mean: Train cars, if you look at them, can be broken down pretty easily into basic shapes like rectangles and circles. There are also standard, familiar, iconic “train car” images that many people are familiar with…Think of Thomas the Tank Engine or The Little Engine That Could. If I can see the basic shapes and come up with a couple of those “cliches,” then I can use them to create a pattern someone else will recognize as a train car, even if there’s not a lot of artistic flair involved.
I did the same thing when I made the Castle Set. Princess = triangle hat (shape) and little veil (cliche). Castle = rectangles (shape) with crenellations (cliche) on top.
I Thank Goodness for Google Image Search
Then I do a few Google Image Searches. I typed in “train engine” and “caboose” and “passenger car” and looked at a collection of the photos and clip art at once. I was looking for specific details: I know I want a smokestack on the front of my train engine, but where is it? And how big is it? When I looked at the passenger cars, I didn’t know yet what detail would set them apart from the other cars, but in the Image Search I noticed that many of the cars had rounded roofs.
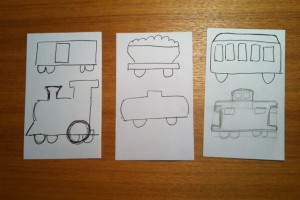
Then with all the images on the screen in front of me, I make my first rough sketches. I’m not trying for anything fancy, just working on getting those basic shapes and those cliché pieces in place. These are sketched on the back of 3×5 index cards:
I Start Tracing, and Tracing, and Tracing
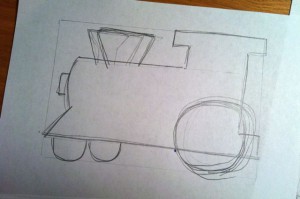
Now I stop looking at the image search results and just work from my rough drafts. For the train cars, I traced a 4 x 6 index card onto a sheet of paper, and sketched out my basic pattern into the rectangle. The 4 x 6 outline does a couple of things: I can use it to help me figure out where some of my lines need to go and to keep them square to each other, and it keeps my finished patterns all relatively the same size.
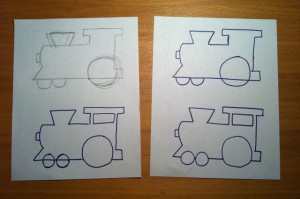
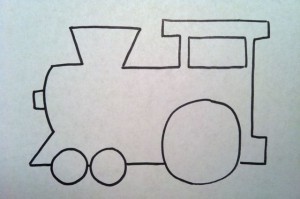
Once I rough out my basic shape in pencil, then I put another sheet of paper over the pencil lines and trace it with a marker. This cleans up the image and I can see easily what I want to fix. In this case, once I saw the train engine in marker, I realized I’d put the front wheels all the way under the cowcatcher. Then I put a sheet of paper over my first marker tracing, and trace again. As I’m tracing, I move the first marker sketch around under the top sheet to make adjustments. So this time when I got to those front wheels, I moved the bottom sheet over, and traced them where I wanted them.
Is this making sense? I’m trying to show that after the first sketch, my process does not involve any freehand drawing. By tracing over and over, I can use parts of the first sketch that turned out well, and make adjustments to the parts that didn’t. If the wheel was too small the first time, I don’t have to freehand another wheel and hope that it turns out bigger, I can trace a larger wheel over the first one. If I’m being a terrible circle-draw-er that day, I can trace a punched shape or a circle template instead of freehanding. If the window turned out to be in the wrong place, I just scoot the bottom sheet over until the window is where I want it, and trace it into a new spot on the fresh copy.
Using marker for my tracing steps keeps me from adding in too many details; I want to be able to cut these pieces out of felt, after all.
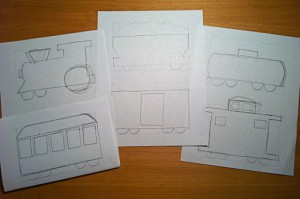
When I’m finally satisfied with how my traced patterns look (and this can take a LOT of repetitions) then I make one final tracing, and photocopy it, and use the photocopy to cut my felt.
Anna had a nice post about making her own pattern for the book How Do I Put It On?
How do you make your own patterns?
Flannel Friday Resources:
The round up this week is on Mollie’s What Happens in Storytime… blog. (If you have a contribution, leave a comment on her round up post with a link to your post. If you can’t include it by the end of the day Friday, go ahead and wait to join next week’s round up. This will make sure the most number of people see your post!)
Round up archives and host schedule is at So Tomorrow. Visually scan all the Flannel Friday posts at Pinterest. Talk about storytime and flannelboards at the Flannel Friday Facebook Page. Follow Flannel Friday on Twitter with the #flannelfriday hashtag. (You don’t have to be on Twitter to check this out.) Last but not least, if you’re a contributer, grab the blog button in the right hand menu here at Mel’s Desk!


.jpg)

5 Responses to Flannel Friday: Making My Own Patterns